Updating or cloning a Azure VM with standard security to trusted launch with secure boot and vTPM
Update 2025.02: Microsoft has provided an additional way to upgrade existing VMs: https://learn.microsoft.com/en-us/azure/virtual-machines/trusted-launch-existing-vm-gen-1
Note: If your source VM is based on the VM generation V1, follow this post to convert your VM: Creating a Windows Azure VM Generation V2 from a V2 VM. Also, follow the link if you want to have an exact copy (and not a clone) of your VM.
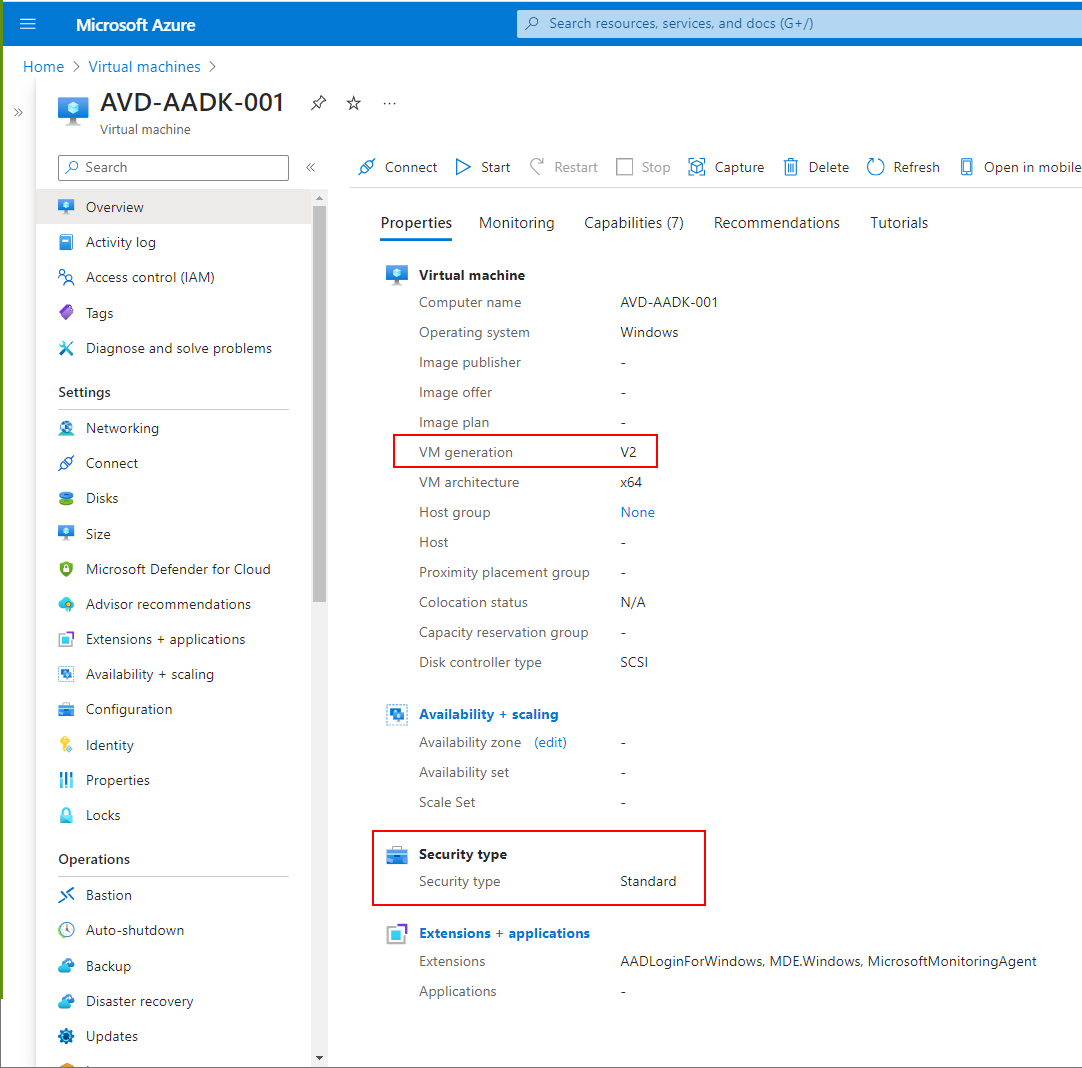
If you once installed an Azure VM with the standard of security, you can not convert this VM into a trusted launch-enabled VM with secure boot and vTPM. But that is sometimes necessary, e.g., if you want to upgrade from Windows 10 multi-user to Windows 11 multi-user.
But there is a way to do that. You could capture your existing VM and store the image in a secure boot enabled. Compute Gallery definition in Azure. From this image version, you can create a new VM with a security-type trusted launch.
Prepare an Azure Compute Gallery
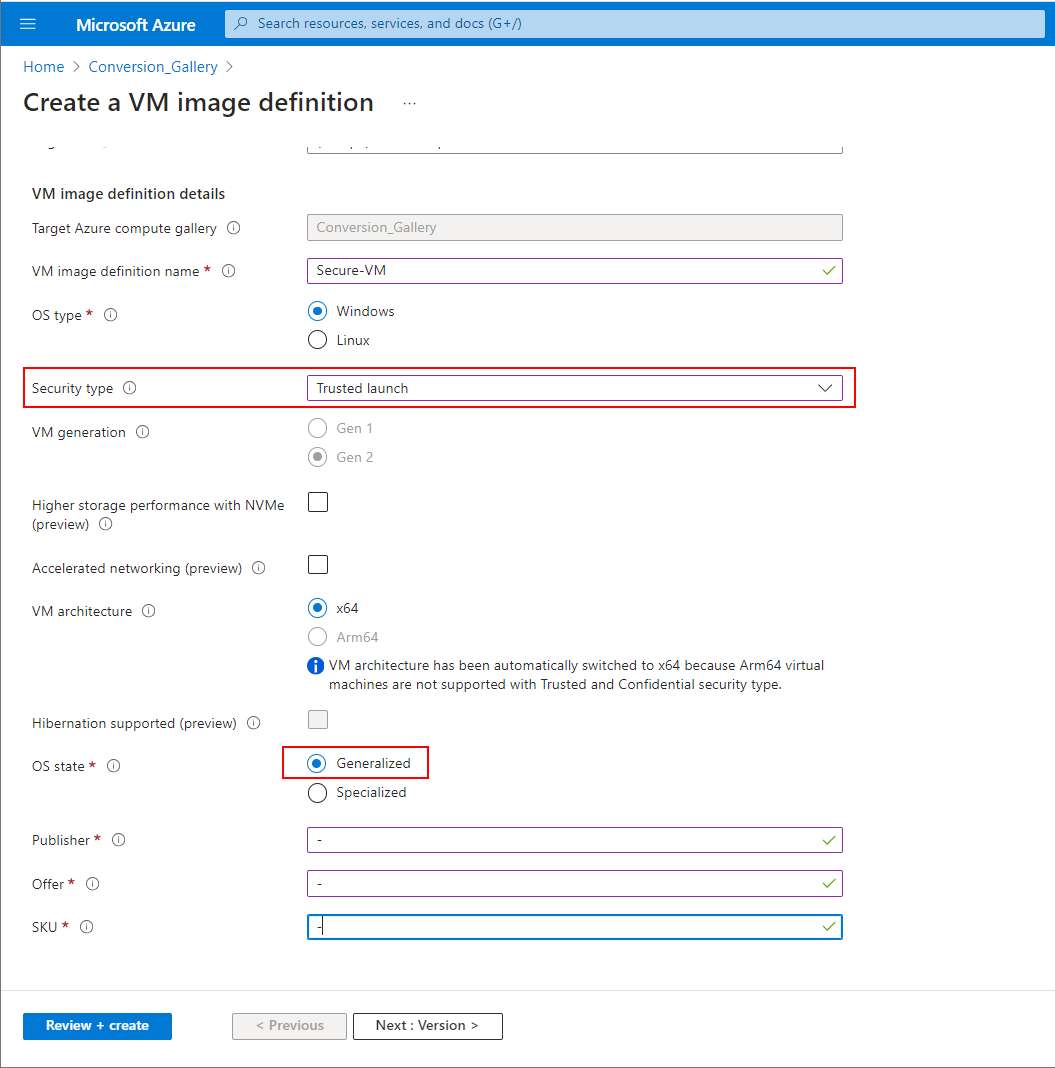
- Create an Azure Compute Gallery "Conversion_Gallery" in the same resource group of your VM
- Add an Image Definition "Secure-VM"
- Security Type: Trusted Launch
- OS state: Generalized
- Tick "Accelerated networking" if this is enabled on your original VM
- Fill Publisher, Offer, SKU with some information
- Click Review+Create, Create
Capturing the original VM
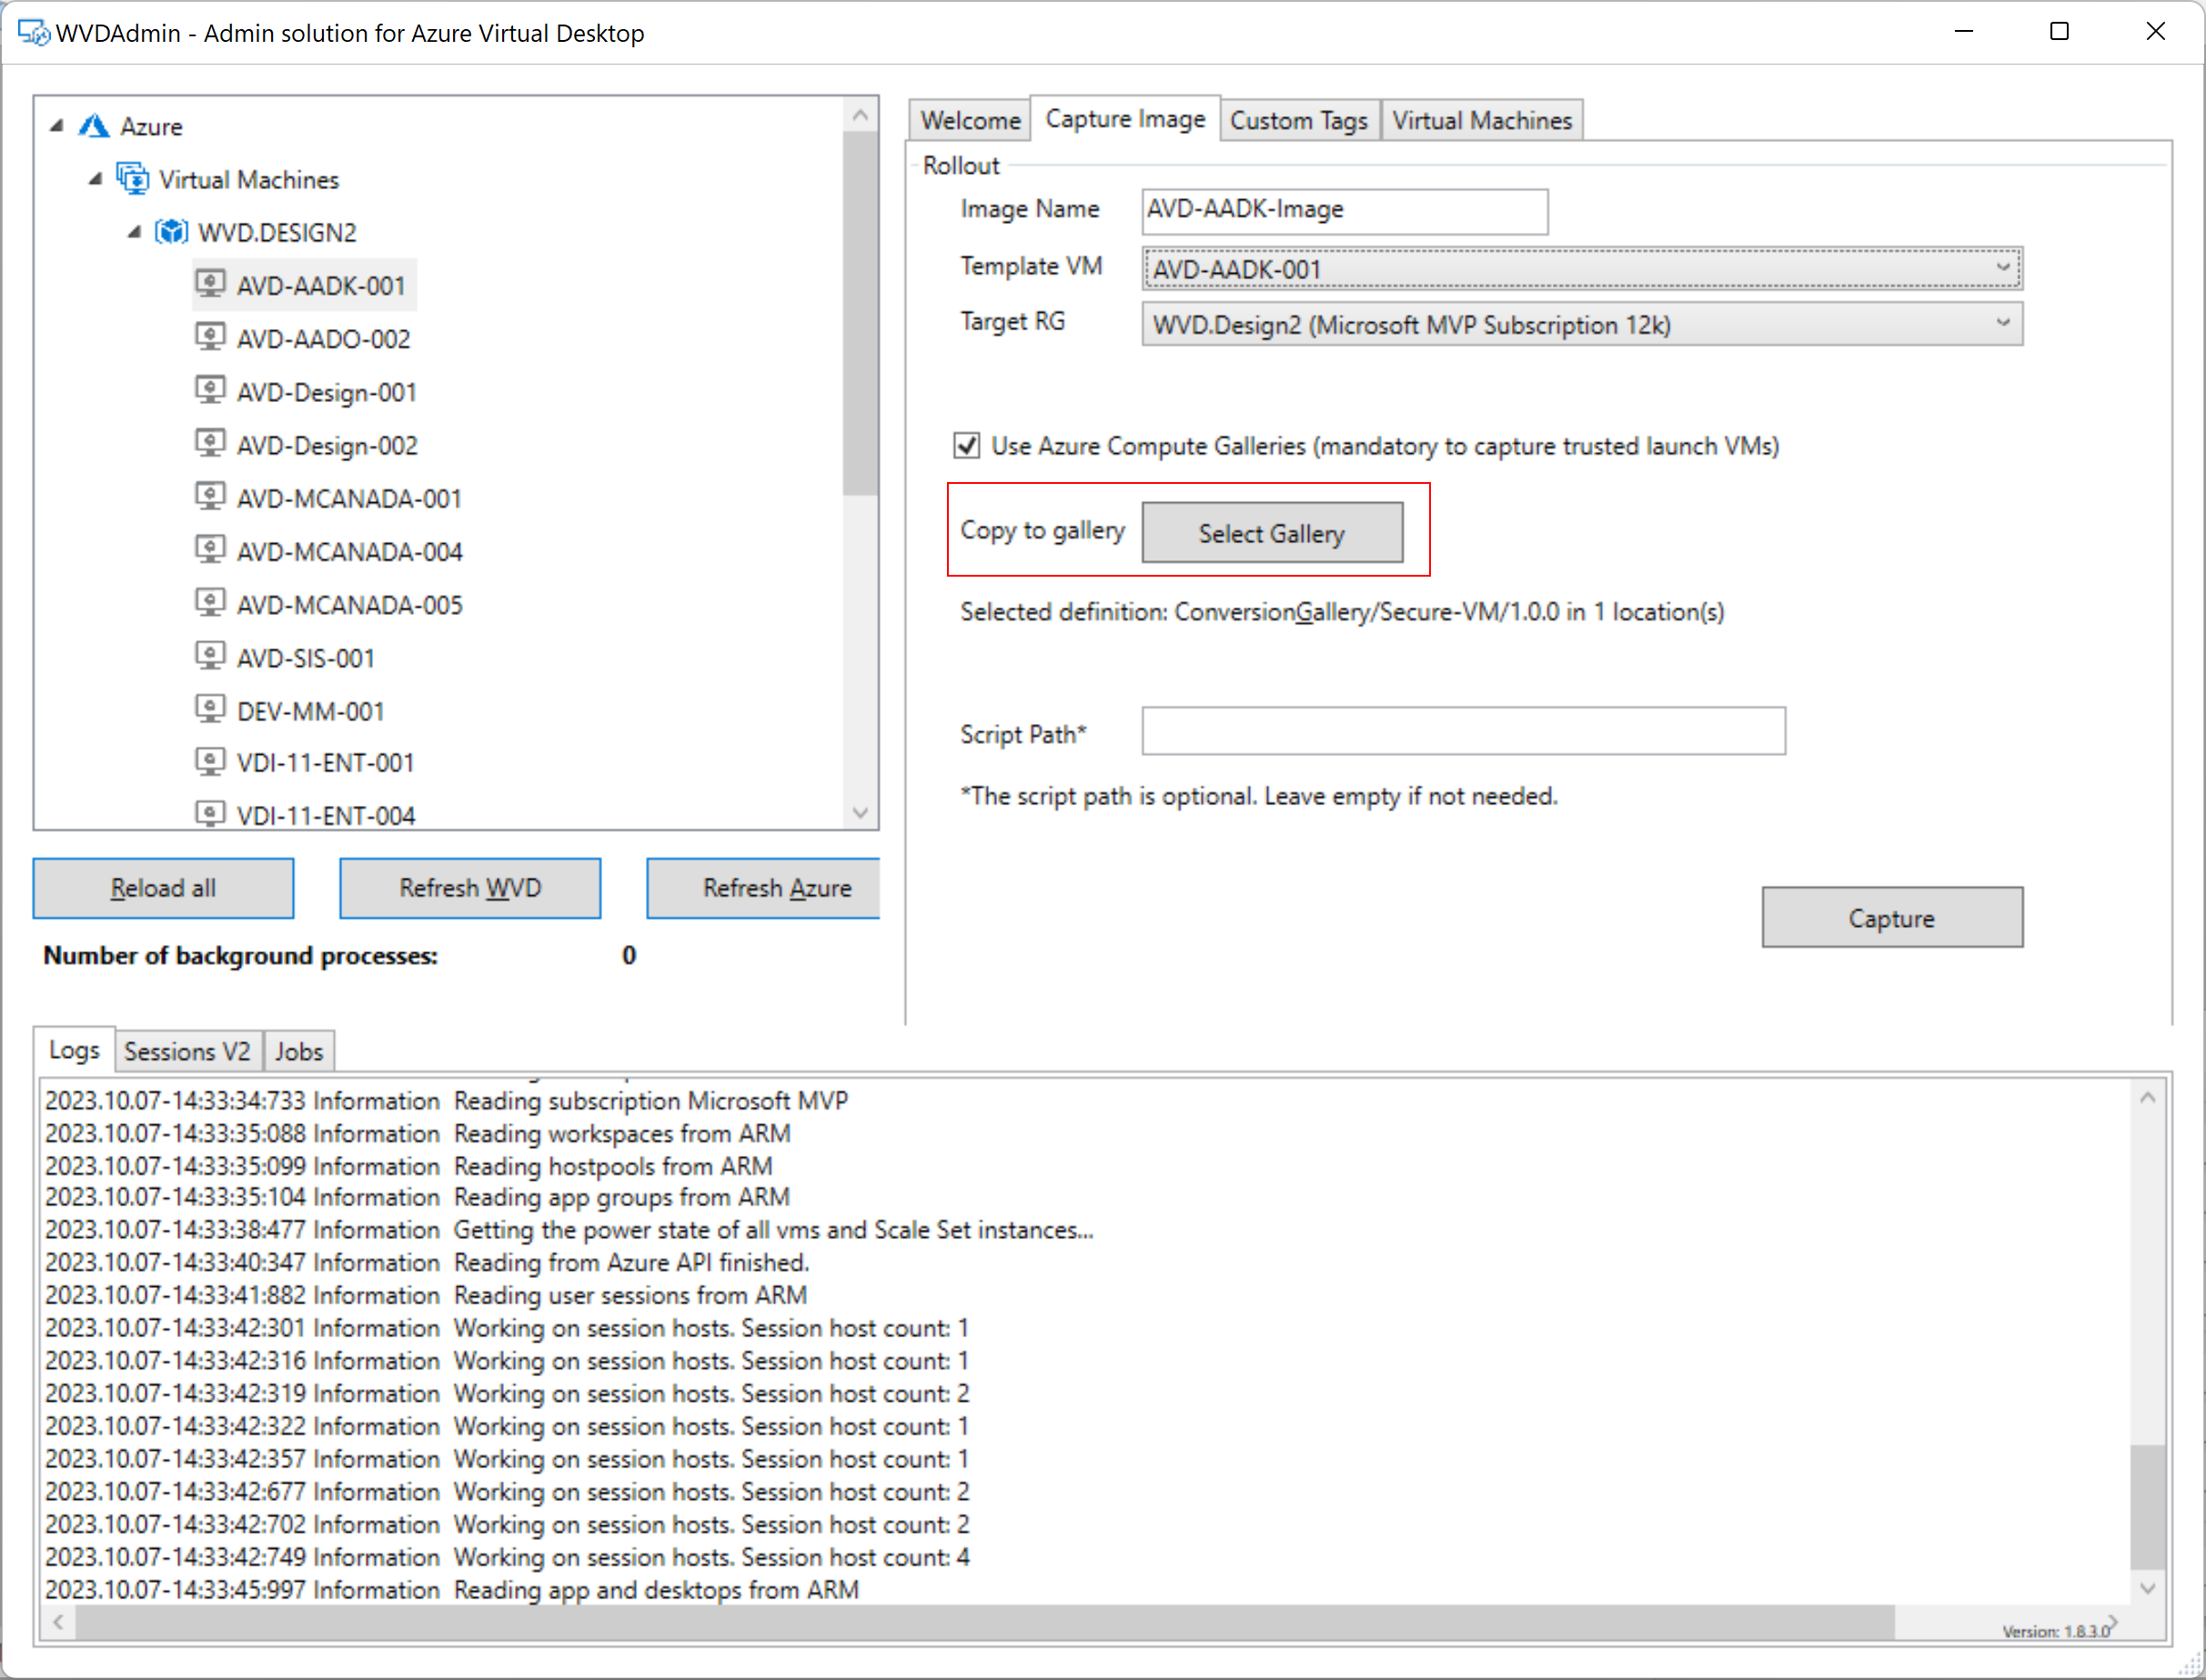
I'm using WVDAdmin to prevent that I must sysprep my original VM. WVDAdmin first makes a clone of the original VM and runs sysprep on the clone. In the end, I have an image in a compute gallery and the untouched original VM.
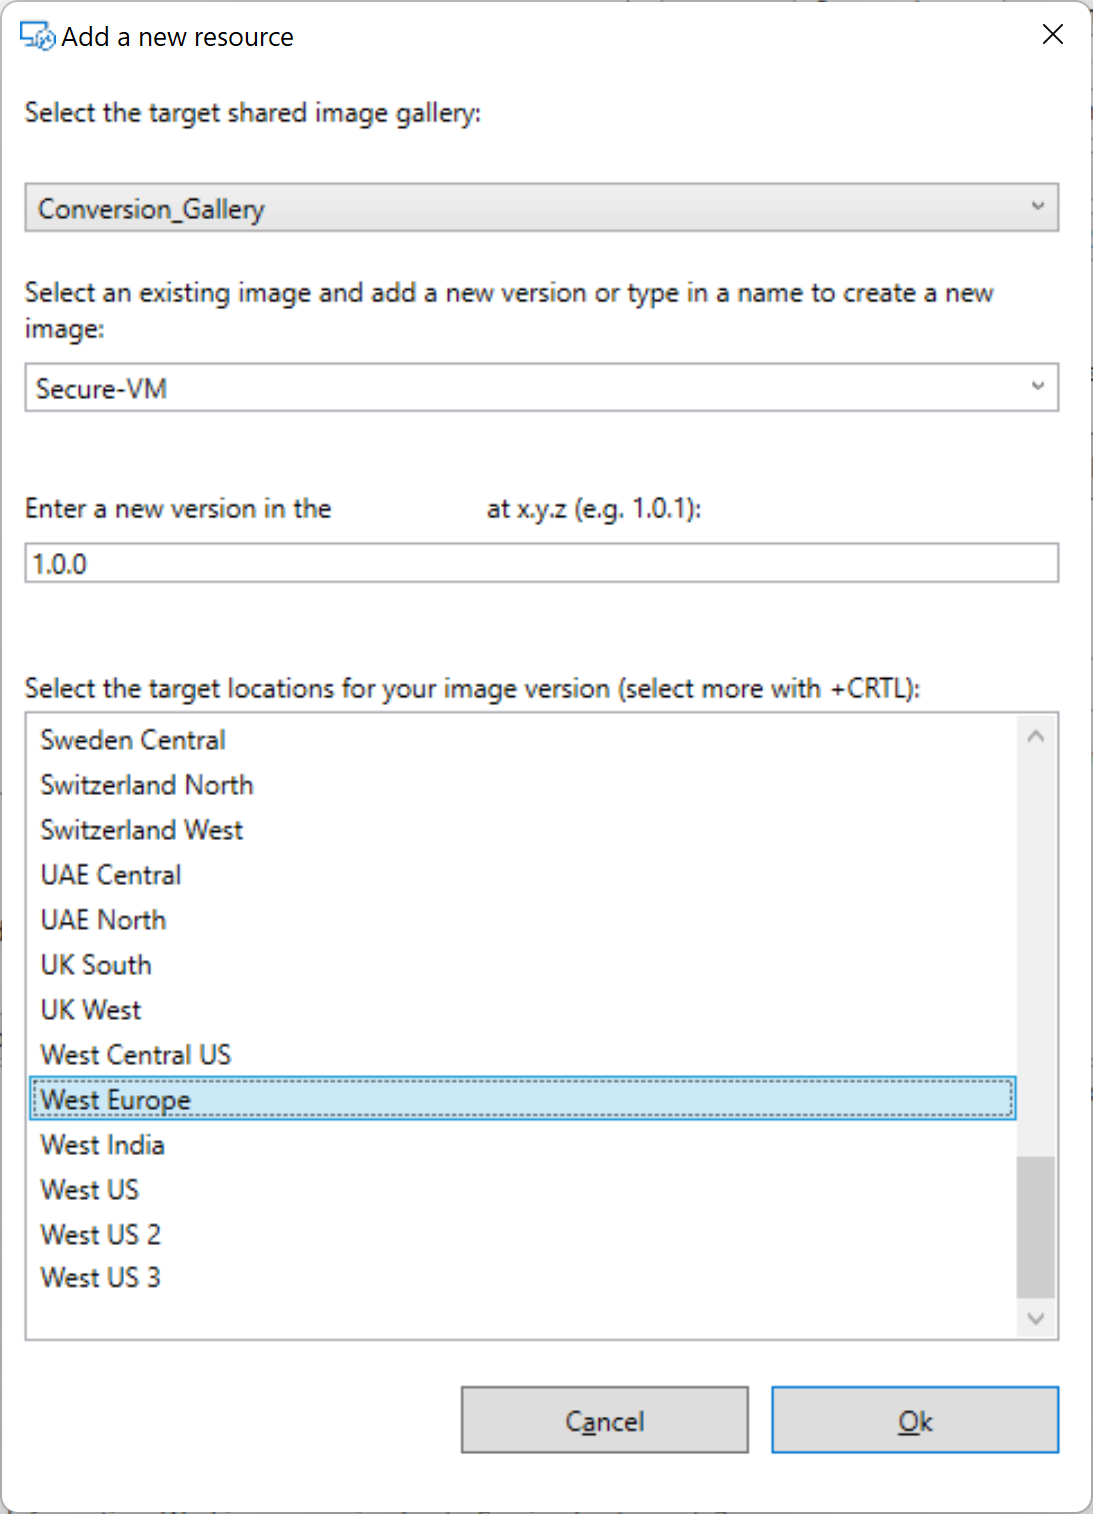
In WVDAdmin: - Azure -> Virtual Machines -> Resource Group -> Right-click the VM and select "Create a template image" - Enter an image name (no spaces) - Select the resource group of the VM as Target RG - Tick "Use Azure Compute Galleries" - Select your Gallery and Gallery definition - Your region from the list - Hit "Capture" - This will take a while to clone the VM, create an image and upload it to the image gallery.
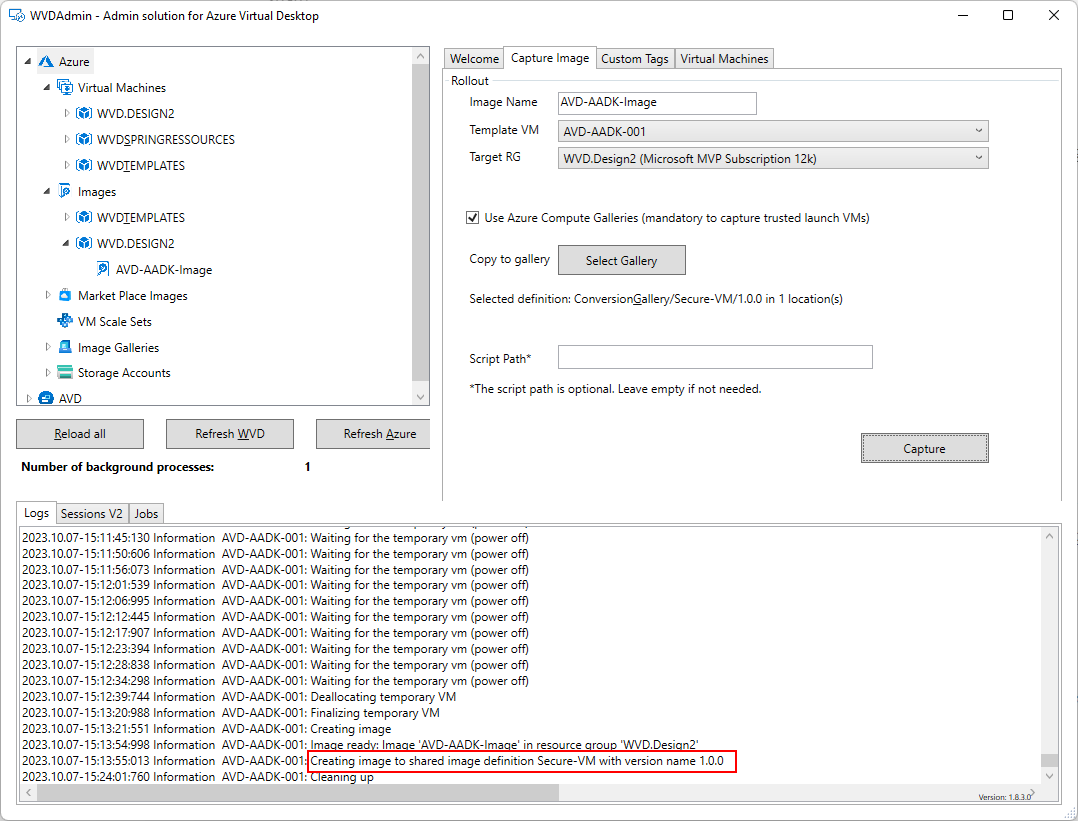
Note: You can delete the also-created custom image (we only need the gallery image)
Deploying a new secure boot-enabled VM from the image
With WVDAdmin or in the Azure Portal, you can create a new VM from that image containing all the applications. Please note that the new VM has a new name and compute identity.
- Go to the gallery definition in the Azure Portal and select your uploaded version.
- Hit + Create VM
- Fill out all parameters and ensure that you select the security type "Trusted Launch"
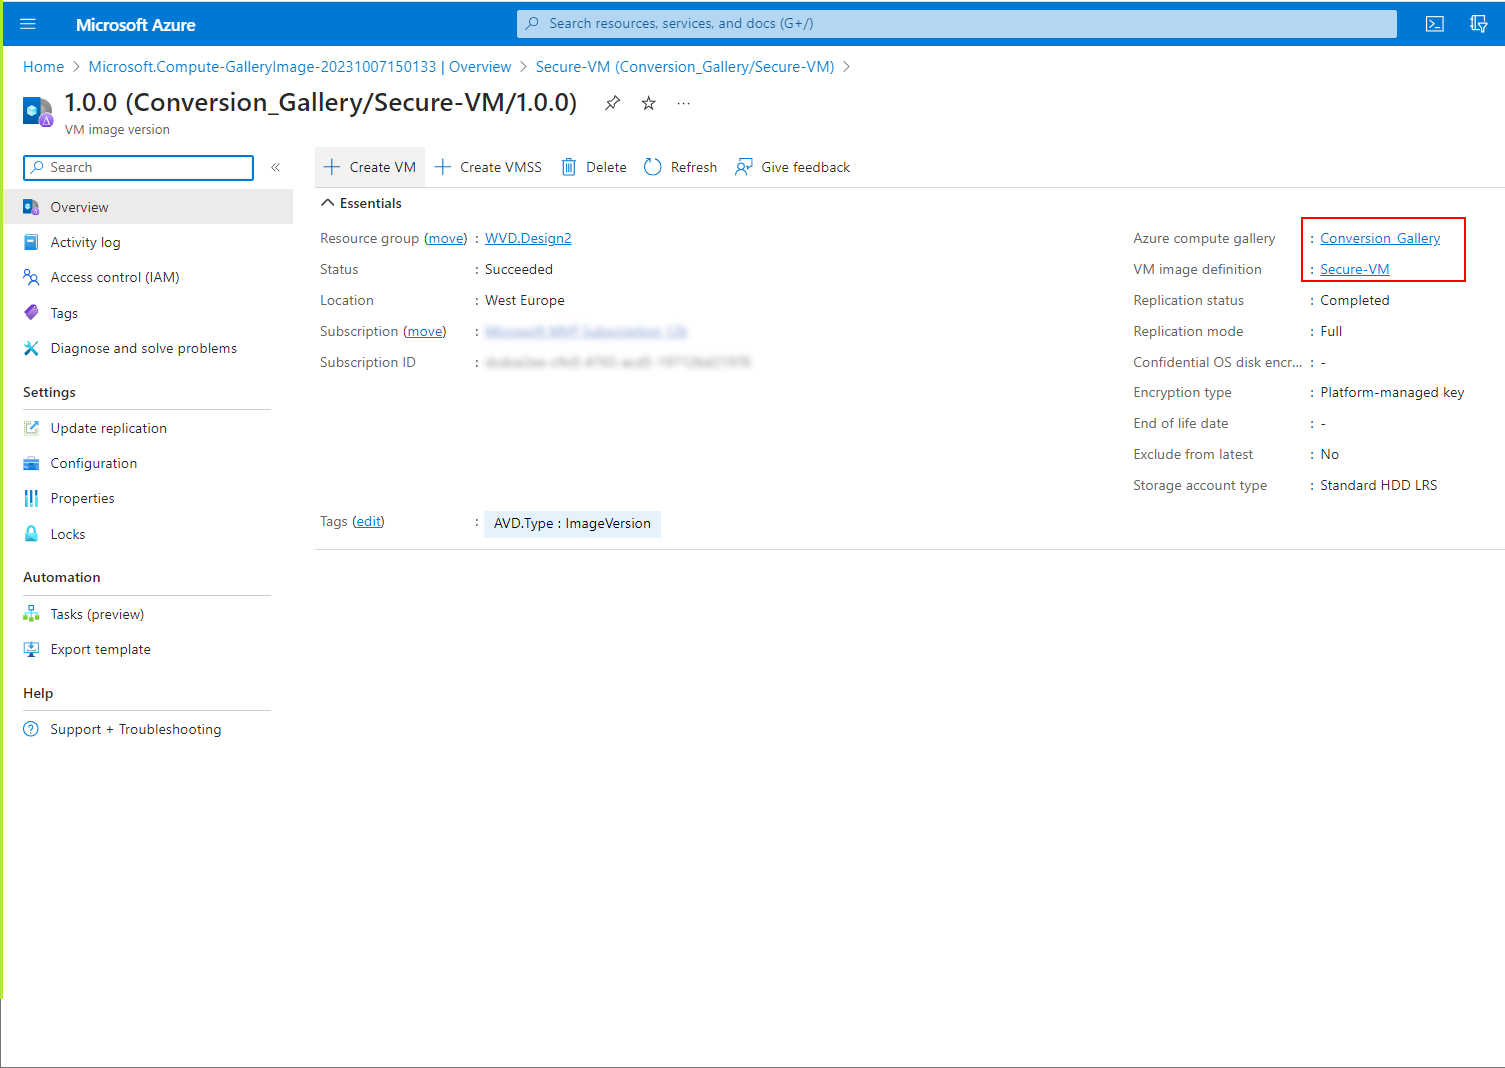
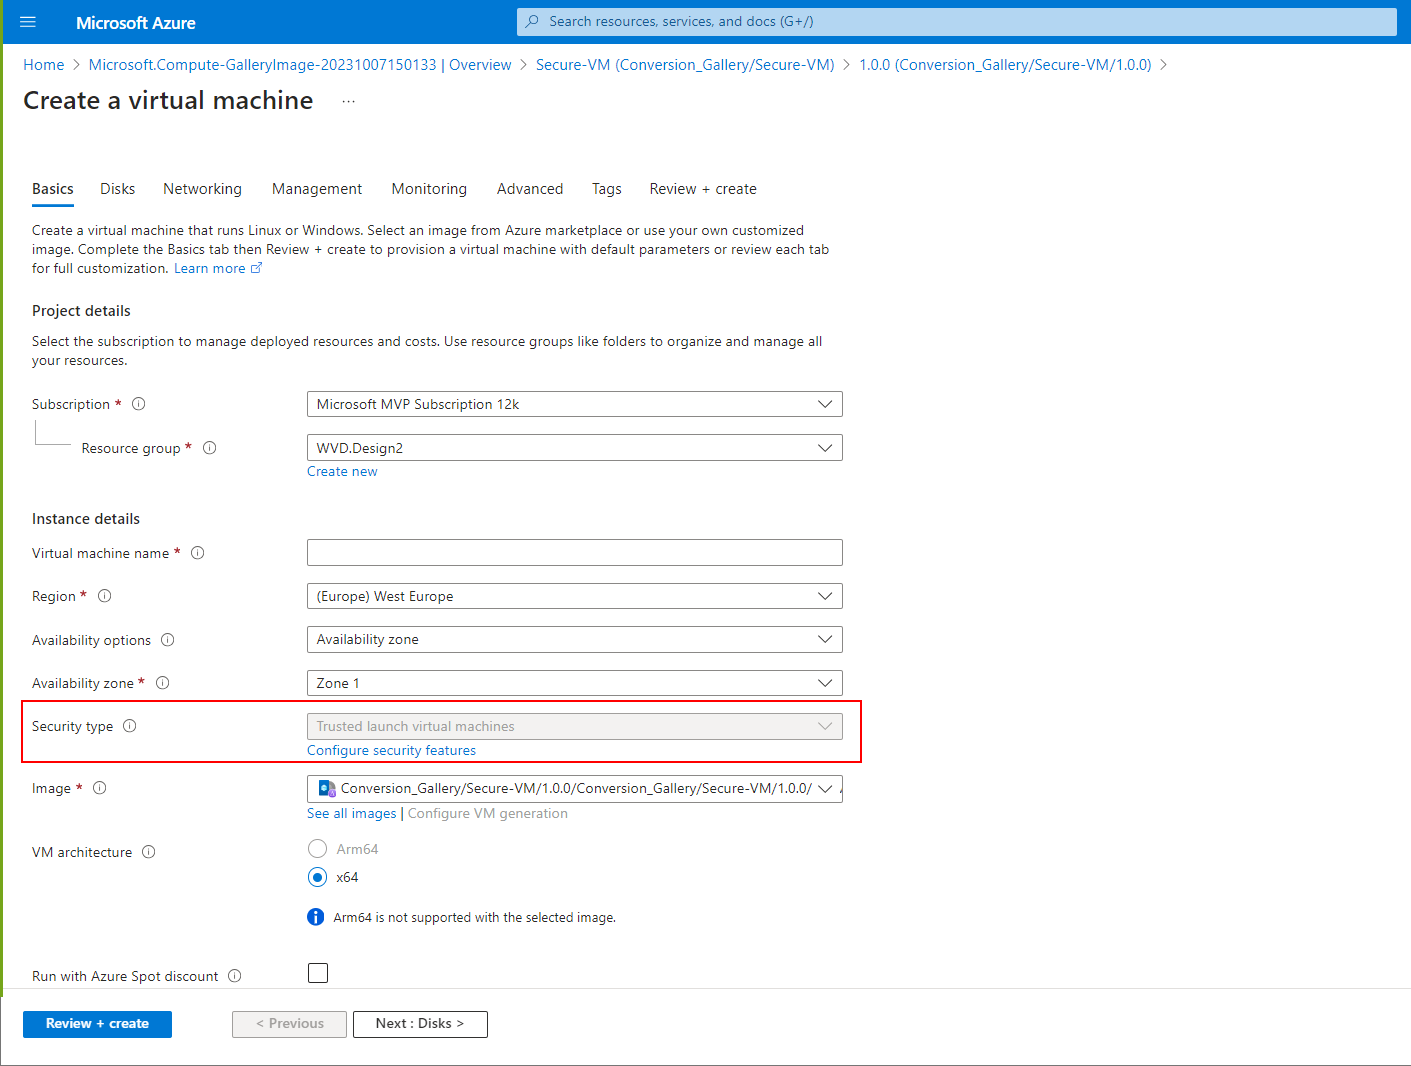
After the deployment, you have a new trusted launch-enabled VM based on your - still existing - original VM.