The Azure Marketplace offers many preconfigured VMs, which are preconfigured images from a third-party vendor used to deploy a VM. One popular offering is "CIS Hardened Image Level 1 on Microsoft Windows 11 Enterprise—Gen 2." The Center for Internet Security Inc. has hardened the Windows 11 image and provides it through the marketplace for a small fee. That is called a "Plan" for a VM.
That image can be used for a Golden Master: Install your application on top, create an image, and deploy multiple session hosts / virtual machines in your Azure Virtual Desktop environment (and yes, that also costs a bit more for each deployed host). Unfortunately, it's not so easy to capture an image directly into an Azure Compute Gallery definition - which is needed if you want to deploy trusted launch VMs afterward.
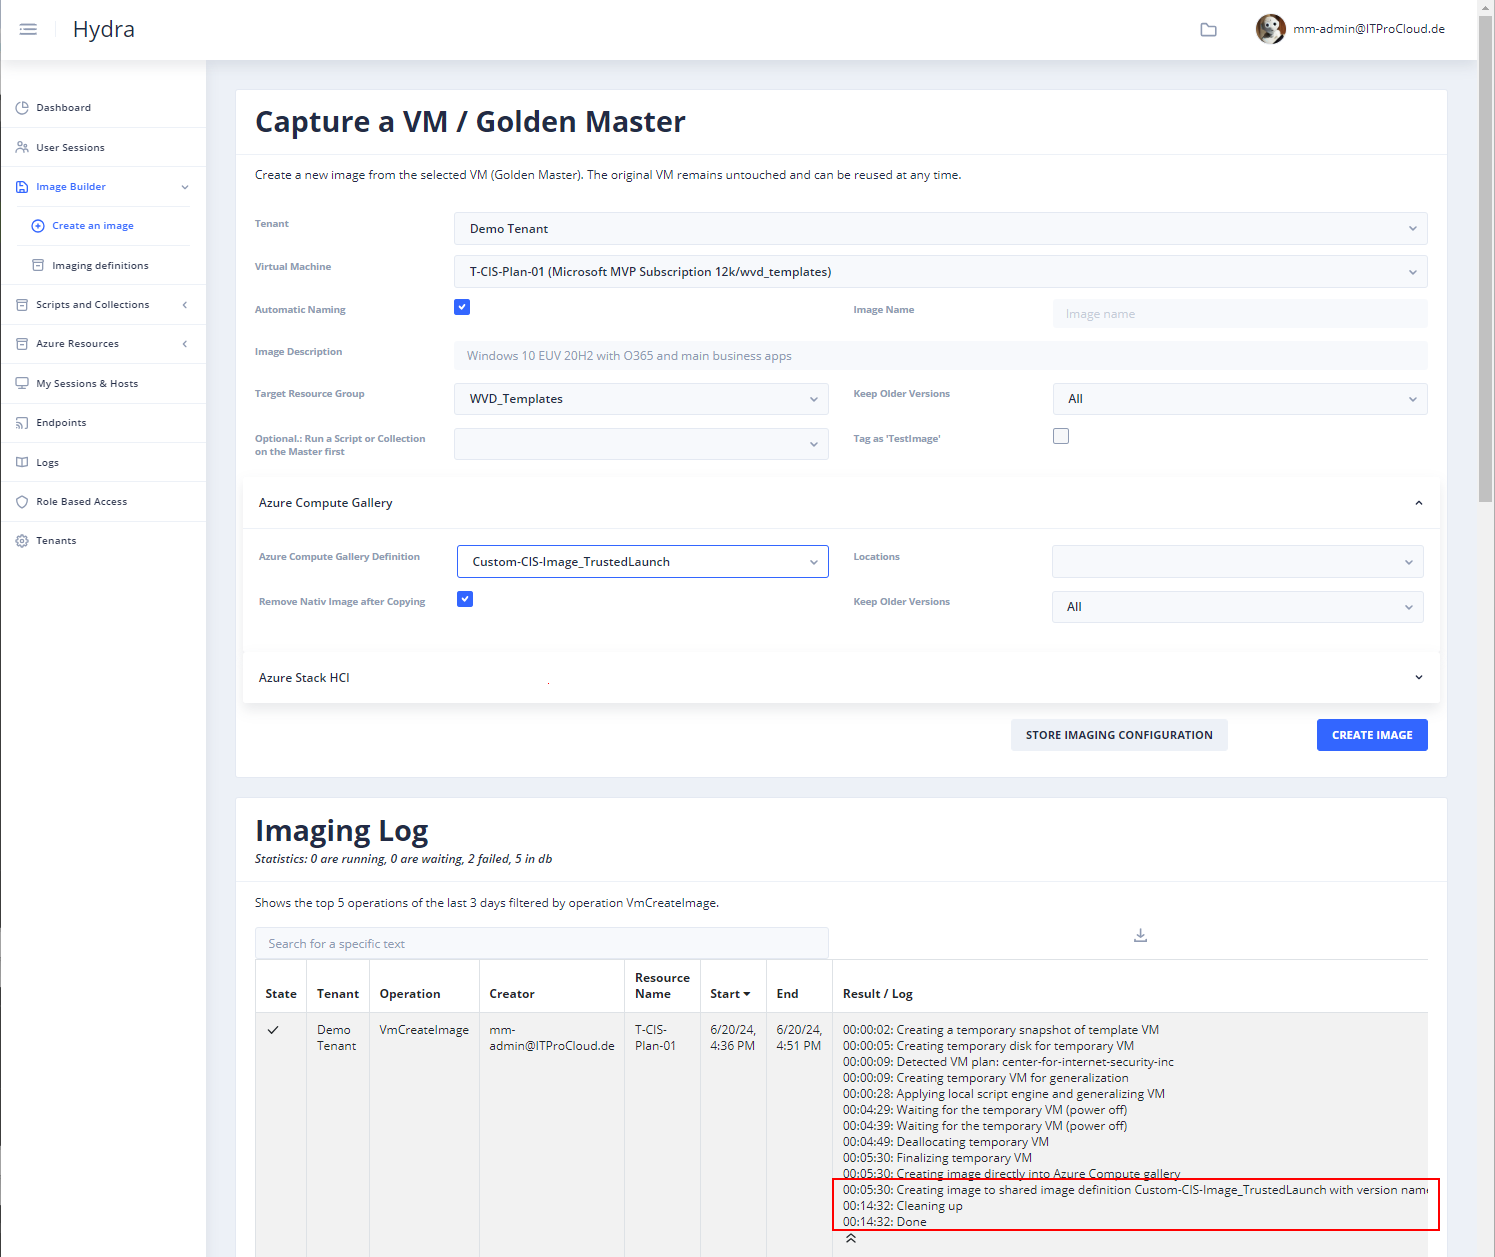
When attempting to capture an image directly into a Compute Gallery Definition using Hydra for Azure Virtual Desktop (to create loss-less images), you may encounter the following error message:
The resource with id '/subscriptions/xxxxxxxxxxx/resourceGroups/WVD_Templates/providers/Microsoft.Compute/virtualMachines/TEMP_T-CIS-Plan-01_2024-06-19_19-19-51' has a different plan ['{"name":"cis-windows11-enterprise-l1-gen2","publisher":"center-for-internet-security-inc","product":"cis-windows-enterprise","promotionCode":null}'] than the parent gallery image plan ['null']
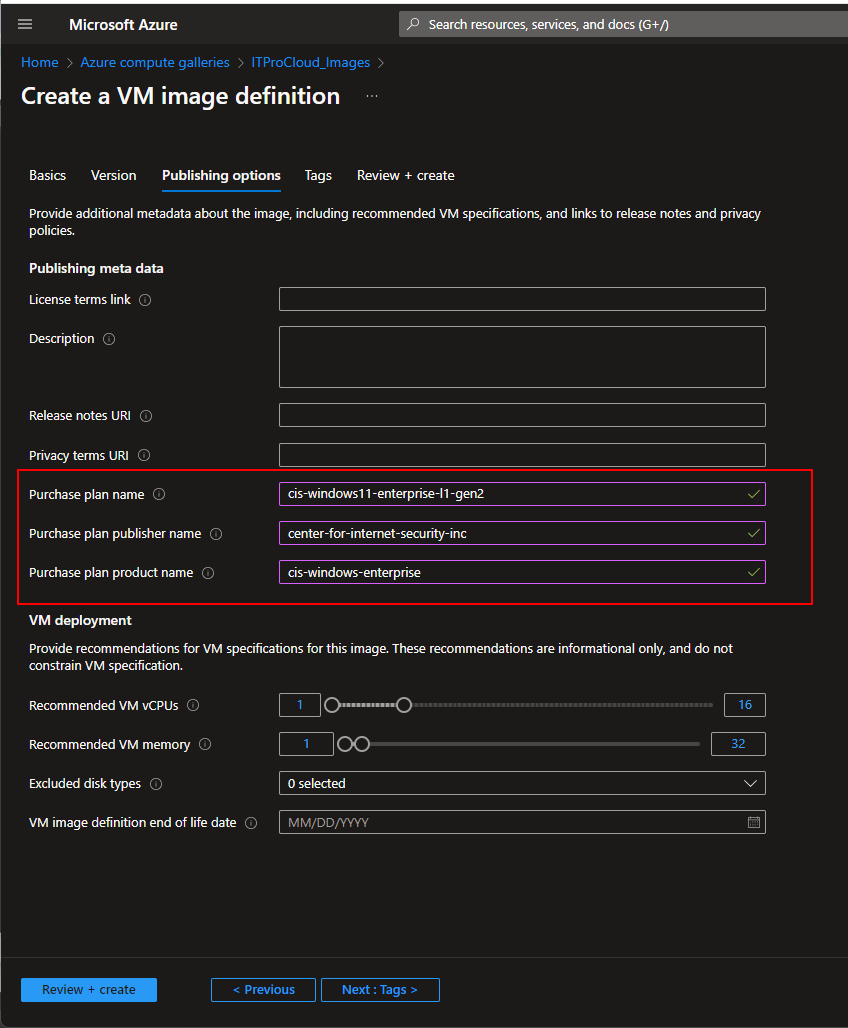
The error message gives a hint. The Compute Gallery Definition must be prepared to accept image versions with a plan (the market place image). Therefore, we have to create a matching Compute Gallery Definition. But first, we have to figure out the "Purchase plan name", "Purchase plan publisher name", and "Purchase plan product name". If you already have deployed the VM / your Golden Master. You can grab the information form the JSON-view of the VM:
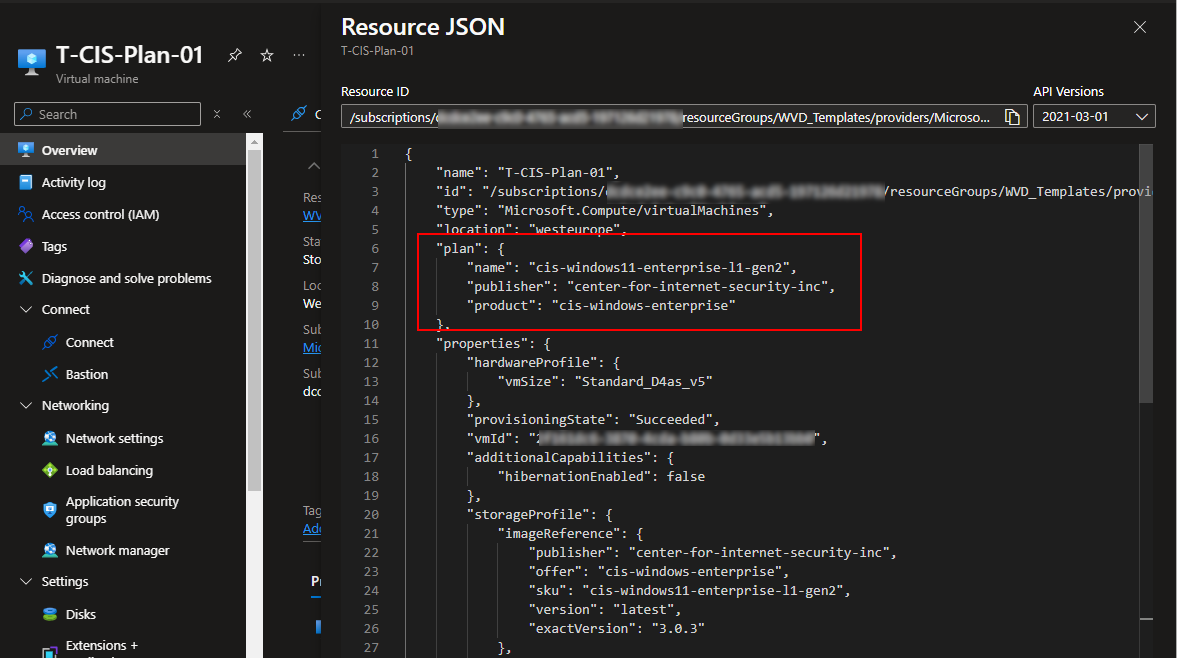
Later, we will use the following data to configure the Compute Gallery Definition:
Name = Purchase plan name: cis-windows11-enterprise-l1-gen2 Publisher = Purchase plan publisher name: center-for-internet-security-inc Product = Purchase plan product name: cis-windows-enterprise
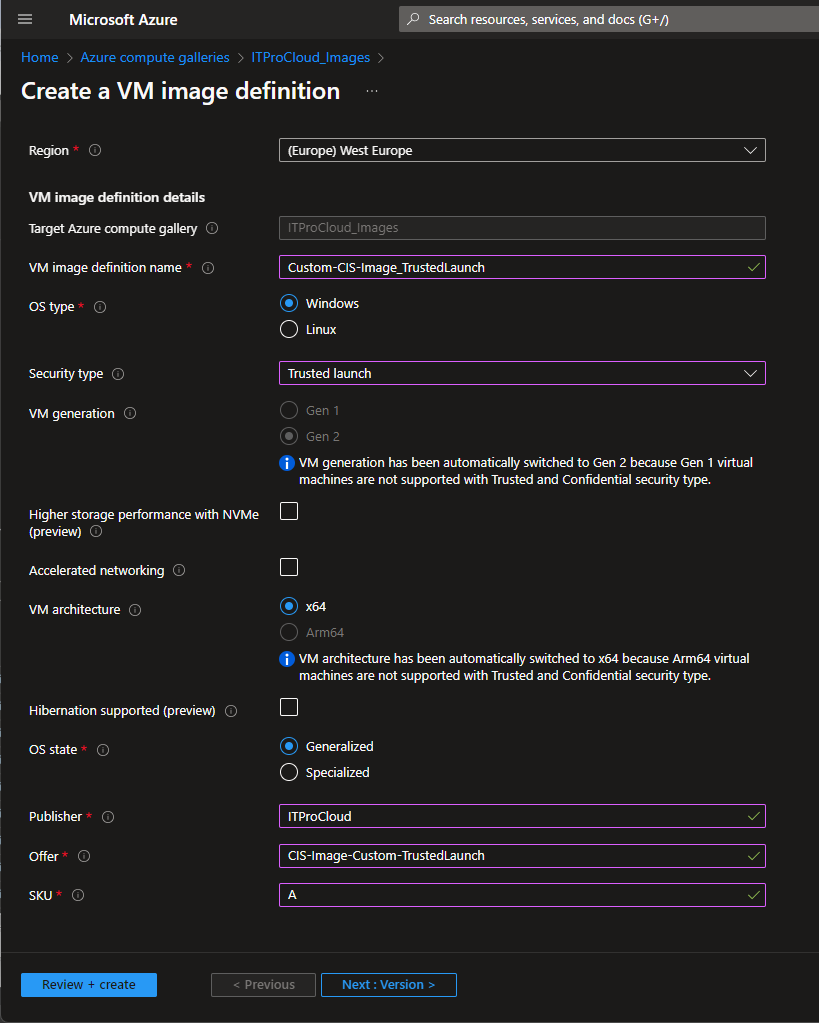
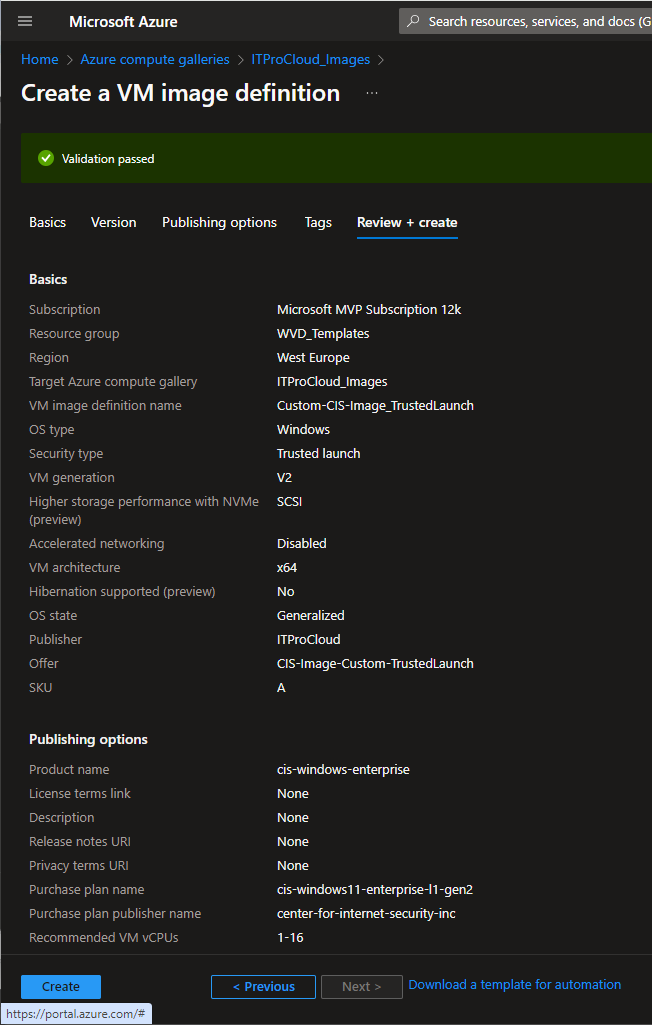
Now, we can start creating the Compute Gallery Definition. If you don't already have a Compute Gallery, create it first. Click on Add -> VM image definition. Fill out the formula, e.g.:
- VM image definition name: Custom-CIS-Image_TrustedLaunch
- Security type: Trusted launch (not support); that allows you to create trusted launch enabled hosts later
- Publisher: ITProCloud
- Offer: CIS-Image-Custom-TrustedLaunch
- SKU: A
(The combination of Publisher/Offer/SKU must be unique in a Compute Gallery)
NEXT -> NEXT -> Publishing options:
That page is important for the plan configuration to store the CIS image. Fill out the fields for "Purchase plan name", "Purchase plan publisher name", and "Purchase plan product name" with the noted values:

Click Review + Create -> Create
Finally, you can create a loss-less image with Hydra for Azure Virtual Desktop directly into the Gallery Definition: